A bathroom works when you can open the door, use every fitting and reach the plumbing. Compare compact layouts, basin heights and clearances before ordering sanitaryware.
Bathroom design
Bathroom layout ideas: practical sizes and clearances
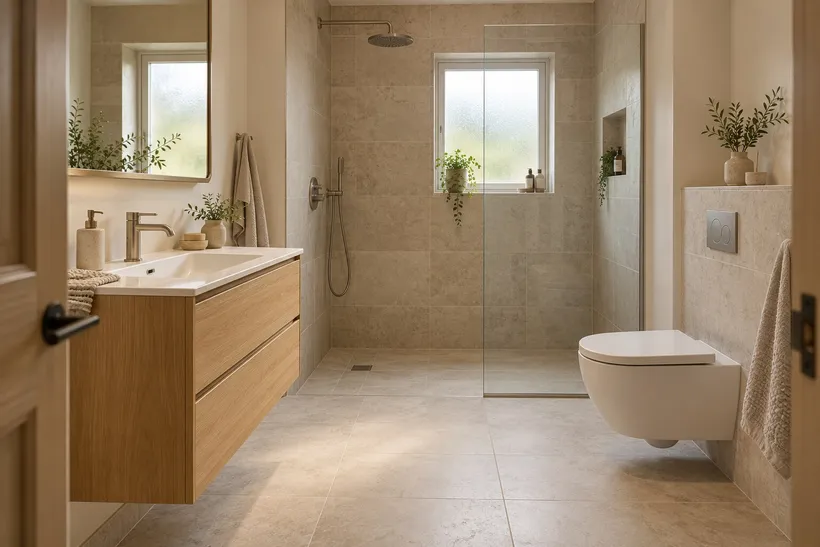
Bathroom layout ideas need more than a neat arrangement of symbols. The basin must be usable with the drawer open, the shower needs an entrance and the toilet needs space around a person rather than just around the ceramic. In a Cyprus apartment, a concrete slab, existing soil pipe or window can constrain the plan more than the room’s floor area. Start with a measured survey and the people who will use it, then compare actual fittings.
This guide covers sizes and placement rather than decoration. For decisions affecting the whole home, see our guide to apartment layouts. A bathroom drawing should also show how its door meets the corridor and whether the household still has a usable WC during renovation.
Start with the drain, soil pipe and finished dimensions
Measure between existing walls, then distinguish those dimensions from the space available after lining and waterproofing, with tiles on top. Record the door opening, window sill, ceiling height, shafts, visible pipes and inspection points. Do not assume a boxed corner is empty space. Photograph the existing services and ask the installer to confirm what is behind enclosures before finalising the layout.
Moving a toilet is not simply moving its symbol. The drainage route, connection level, ventilation and access for maintenance must be assessed. In an apartment, the slab and shared stacks are not freely alterable. Have the plumber and relevant designer establish feasibility before ordering; do not plan unapproved cutting through structural concrete. A smaller basin may solve the circulation problem more economically than relocating the soil pipe.
Use the actual manufacturer’s drawing for each product. A wall-hung WC has a projection from its finished installation wall, while the frame and service space also occupy depth behind that wall. A basin’s advertised width says nothing about the cabinet handle or the distance its drawer travels. Keep a list of selected model references alongside the plan.
Clearances around the toilet, basin and shower
Separate three things on the drawing: the product footprint, the space a person needs to use it and the area swept by doors or drawers. Two free standing areas may overlap if one person uses the bathroom at a time; an open drawer cannot occupy someone’s knees. Rectangles fitting on the plan is only half the question; the intended activities also have to fit together.
For an early sketch, the Duravit bathroom planner lists a 90 × 60 cm free area in front of a vanity and 90 × 90 cm for a front-loading washing machine. These are manufacturer planning references, not legal minima for Cyprus or proof of accessible design. Check the selected products, users and local project requirements.
In a first mock-up, try leaving about 60–75 cm clear in front of the WC and basin, then test sitting, standing and bending. This is a comfort starting point, not a compliance rule; more may be needed. Measure from the frontmost finished edge to the opposite obstruction. At the WC, mark the centre line and both outer edges so lateral clearance is not confused with a centre-line dimension.
Do not substitute these suggestions for an accessible bathroom assessment. A person using a wheelchair, a walking aid or assistance may need transfer space, a different door arrangement and specifically positioned supports. Nor does a large room automatically offer those conditions. Define the intended use early and have a suitably qualified designer check the complete arrangement.
Basin height, tap position and mirror
The Geberit washbasin guide gives typical top-edge heights around 85 cm for classic basins and 90 cm for lay-on basins, adjustable to users. Treat these as starting references. Mark the finished basin rim, not merely the cabinet top, and try the position with the main users before fixing a wall-mounted unit.
Sitting above a worktop, a bowl adds its height to the total. Putting it on a cabinet chosen for an inset basin can leave the rim uncomfortable. Check the tap outlet relative to the bowl, handwashing space and the splash pattern with compatible products. A tall tap is not automatically the right match for a shallow bowl.
Place the mirror so users can see themselves without leaning awkwardly; there is no universal gap above every basin. Show lights, mirror cabinet doors and nearby sockets on an elevation. A cabinet that opens against the tap or a wall lamp needs revision. Electrical positions and wet-area suitability must be checked by a qualified electrician rather than copied from an inspiration photograph.
Small bathroom layout plan: three arrangements to compare
A small bathroom layout plan works best as two or three scaled alternatives using the same product sizes. Keep the existing drainage constraints visible on each. Floor area alone cannot decide the winner: two rooms of equal area can have very different usable wall lengths and door positions.
- Fittings along one wall. Useful in a narrow room when services already follow that wall. The opposite side can remain a circulation strip; avoid a deep vanity that pinches it.
- Shower across the far end. Can make use of a room’s full width, provided the entry, screen and drain work. Check the window, cleaning access and where the towel is reached after showering.
- Fittings on adjacent walls. Often useful in a more square room. Test the corner carefully: cabinet drawers, WC use and shower doors may compete for the same patch of floor.
With a room of around 4 m², do not assume that a shower, WC, large vanity and washing machine all fit comfortably. Draw the real enclosure thickness and appliances. If one arrangement works only with every door shut and nobody bending down, reduce the specification rather than compressing the clearances until the plan looks complete.
Compact bathroom layout: avoid false space savings
Useful room in a compact bathroom layout can come from a shallower basin, a different door movement or better-positioned storage. Check whether a small handrinse basin is suitable for daily washing: a shorter projection is helpful only if hands fit and water stays in the bowl. Tight bathroom layouts need full-size trials more than optimistic catalogue pictures.
Wall-mounted furniture can make the floor easier to clean, but does not remove the need for supports and service space. A recessed cabinet saves projection only where the wall construction permits it. Do not create a niche in a structural or shared wall without assessment. Locate everyday toiletries near the basin, with spares higher up or elsewhere, instead of forcing a deep cupboard into the main route.
In a long narrow bathroom, compare the end-shower option with a line of fittings before adding a partition. A screen may protect the toilet from spray but also narrow the entrance. The useful width is the remaining opening after profiles, handles and the screen are installed, not the tray’s overall size.
Shower and bath: the usable space is larger than the outline
As a practical design trial, mark out a shower area around 90 × 90 cm and test turning, raising your arms and reaching the controls. This is an illustrative starting size, not a universal minimum or an accessibility standard. A larger rectangle can be easier to use, while a product sold in a smaller size still needs an assessment of comfort and safe access.
Draw the door sweep or the full walk-in opening. Check whether the controls can be reached without standing in the initial spray, and where dry clothing and towels stay. A flush entrance depends on the drain, available floor build-up and waterproofing; it cannot be promised solely because the drawing shows no step. Our walk-in shower guide covers that construction separately.
Allow room beside a bath to step in and out and reach the taps. Compare its installed rim height, including supports and finish, rather than only the shell height. If a shower is also used over it, assess that entry with the actual users. A combined bath-shower can save floor area, but it is not automatically a substitute for easy shower access.
Bathroom floor layout, door swing and laundry
The bathroom floor layout should show the entrance door fully open. An inward-opening leaf must not collide with the basin or trap someone between the door and WC. An outward opening needs a safe corridor position; a sliding door needs parking space, suitable hardware and consideration of privacy. Check the adjacent room as well as the bathroom before choosing.
For a washing machine, include hoses, required ventilation, the open drum door and room to load a basket. Follow the appliance installation instructions; do not tightly enclose a model intended for freestanding use. Confirm access to shut-off valves and the filter, and whether the machine can be removed without dismantling the basin. Stacking a dryer requires an approved compatible arrangement.
A separate WC may suit simultaneous morning use, while a combined bathroom can simplify circulation in a small overall footprint. Compare the needs of the household before removing a dividing wall. Keep ventilation and access to services in both options. A window or an air conditioner is not by itself a complete moisture-extraction plan.
Who can plan and check your bathroom layout?
On Cozy, compare specialists in bathroom design, bathroom renovation and plumbing. Use the bathroom design gallery for ideas, then request dimensions rather than copying proportions from a photograph.
Before approving the order, ask for a plan and key wall elevations showing finished dimensions, product references, access zones, door movements, service positions and installation heights. Mark unresolved items clearly. The drawing used by the plumber, cabinet supplier and tiler should reflect the same agreed products and finished floor level.
- Mock up fixtures and door movements with tape and boxes.
- Test everyday use with the people who will use the room.
- Confirm drainage, supports, ventilation and electrical feasibility with the relevant trades.
- Keep maintenance openings accessible after the furniture is fitted.
- Recheck dimensions on site before ordering made-to-measure glass or furniture.
Frequently asked questions
What is the minimum size for a bathroom with a shower?
There is no useful universal area that answers the whole question. Shape, entrance, fixtures and user needs determine whether a layout works. Draw real products and clearances; accessible use and project-specific rules need a separate check.
How much space do you need in front of a toilet?
Test a clear depth around 60–75 cm as an early comfort starting point, then adjust for users and the selected WC. Measure from its front edge. This is not a statement of legal or accessible minimum dimensions.
Can you move the toilet to another wall?
Sometimes, but have the drainage route and structure assessed first. A longer connection can affect levels, boxing and maintenance. Do not order the revised fittings until a professional has confirmed a workable installation.
Is a separate WC better than a combined bathroom?
It depends on simultaneous use and available space. Compare morning routines, door movements and cleaning, not just the apparent floor area gained by removing a wall. In a small flat, keeping an existing second WC may be more useful than enlarging the main bathroom.